Papermaking was more popular a few years ago, and I really enjoyed it. It's been at least seven years since I took out my tools and supplies, but I thought I'd give it a try again.
What you need:
paper-copy paper, paper bags, colored napkins-not glossy paper or newspaper
water
Elmer's glue (if you'd like to add it, not necessary)
glitter
plant leaves
dried flowers or other things to add to your paper
Tools and supplies:
buckets
blender
kitty litter box or dishpan
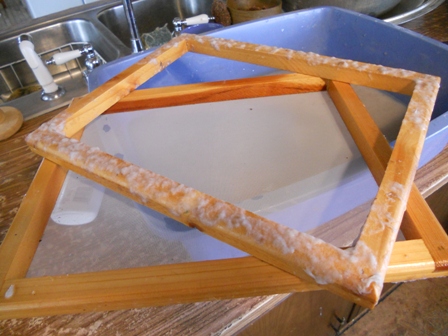
mold and deckle (look this up, can be made at home with picture frames)
felts (or other material for couching the paper)
newspaper
2 boards (12"x12")
C-clamps
sponge
straight edge (for taking water out of paper)
clothesline
iron
Begin by taking your used paper and tearing it into bits. I put mine by color into different buckets. Six pieces of paper make about 3 pieces of new paper.
I have pieces of paper bag in the pink bucket. Most of my paper comes from the recycle box in the local school copy room.
Add enough water to each bucket to cover the paper plus two inches. Let this set for a few hours.
Now put a couple of handfuls of this paper into the blender. Add 2/3 s again as much water as paper scraps. Blend on high until it forms a slurry.
Pour the slurry into the dish pan. Blend up a couple more batches and add to the pan.
This is what the white pulp looks like. Add water to this until it's about2 1/2"-3" deep.
The mold and deckle. Place mold on top of the flat side of the deckle. Lower into one side of the dishpan and pull towards you. Shake back and forth to get an even layer of pulp on the deckle.
Take out and drain it a bit. Take the mold off and flip this down onto the couching pad that you've made. Oops! Here's how to make the couching pad. Layer newspapers on top of each other to soak up the water that will drain off of the paper and lay a felt or couching paper on top of it.
Here's my couching pad.
Here's the first sheet on top of the pad.
The screen is facing you. Now take your sponge and absorb all of the excess water you can.
Now use the straight edge and push the rest of the water into the sponge.
Gently pull the screen off of the paper and there's your first sheet.
This one is a combination of white and paper bag. I really like the way it looks. Take the felt and paper off of the newspaper pile and place a fresh felt down for your next piece of paper.
I took some leaves off of the Boston Fern and will press these into the paper to emboss them.
For a smoother finish I place a hard plastic film on top to be pressed into the paper.
Here's some made with the green pulp with the film on top.
Not a great photo.
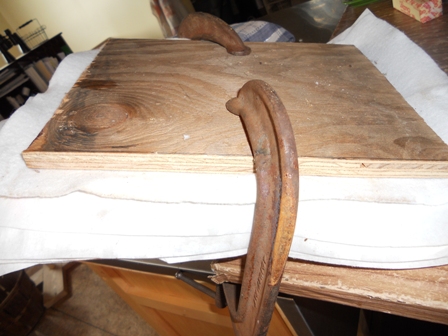
After you've made all of your sheets of paper, stack them evenly, with the couching felts, one on top of the other. Place extra felts on top and bottom. Put one of your boards on the bottom and one on top and use the C-clamps to compress the pile as much as possible.
Leave this overnight. There are other ways to press your paper, weights, etc. , but I like the C-clamps.
Take the stack apart and hang your damp paper, on or off of the felts on a clothesline to dry. I placed this batch on the basement floor because when I tried to hang it, it wanted to come off of the felts.
Once it's dry, carefully remove from the felts.
Now, place a piece of paper under the new paper and one on top. Turn your iron to a low setting and iron the paper to help it stay flatter.
Here are how some of the pieces came out-
This is the one with the paper bag in it. I'm going to use this to print up labels for my soaps.
This piece was a lot brighter when it was wet. The colors didn't show up as well as I'd hoped.
This isn't a good picture, but you can see the different colored spots in this piece. This one I'll use for a baby shower card.
There, that's it. There's so much you can do with this. You can make paper out of fruits, vegies, straw, etc. You can put dried flowers or herbs into it. Use a doily to emboss it. So many options, so little time.


 I have the Little House Cookbook, which I bought when we were studying the Little House series for homeschool. I really like this book as it has all of the recipes that are mentioned in the series of books.